
YSMenu
Contents
What Is YSMenu ?
YSMenu is a homebrew version of the ttmenu that loads faster than the original menu and looks similar to an unskinned r4 menu.
- Advantages of YSMenu over TTMenu:
- + It sorts the roms alphabetically (TTMenu sorts by order of installation)
- + It shows folders allowing you to organize your roms into separate 'Groups'
- (TTMenu shows all 'NDS' file in one long list [even 'plugins' from programs like moonshell2])
- + It attempts to patch the browser and GBA games without having to use a separate loader program
- + It runs emulated programs directly in the emulator in one step.
- Disadvantages of YSMenu over TTMenu:
- - Not graphically 'Pretty' (See DSTT Menu, YSMenu)
- - It doesn't support Multiple 'Skins/Themes' (It's possible using 3rd party Homebrew - see later)
- - Uses Official DSTT loaders - so any problems with DSTT then this will not fix them
- - Default Language/Help is Japanese, so some editing required to get English
Where do I get it?
YSMenu is created by Yasu who doesn’t want anyone to link to any pages other than his home page.
Yasu’s home page is http://home.usay.jp/. It's mostly in Japanese, but to get YSMenu, follow these directions:
- Click the "ETC" button in the main menu near the top beneath the title.
- Select "Nintendo DS" (second item) from the table.
- Search for "DS(T_T)DS" (CTRL-F) or just scroll about 2/3 of the way down until you see the heading in blue.
- There is a scrollable text area beneath that heading. Select the first item in the scollable list (currently "2009/03/21") to download the latest version.
How do I install YSMenu?
UPDATE: The following instructions were the original way of installing, however since this WIKI was made 'Logue' has developed the YSMenu Automated Installer: (Link @ bottom of page) to make life easier.
If you have an R4 there's installation instructions Here
To install TTMenu and YSMenu for DSTT, It's recommended that you make a backup of your microSD card, reformat it using the Panasonic formatter, then follow these directions carefully:
Make sure you have the following items:
- Newest version of YSMenu From Here
- The official TTMENU folder From Latest Firmware Download
- 'fake-killer-disabled' TTMENU.DAT From this Archive
Then
- Unzip the official TTMenu archive. Place ONLY the "TTMENU" folder onto your microSD card.
- Do NOT copy TTMENU.DAT from the official menu as it contains fake-killer code.
- This will destroy your DSTT card if it's a "fake"
- Unzip the YSMenu archive.
- Create a folder named "YSMenu" on your microSD card.
- Place a copy of the fake-killer-disabled "TTMENU.DAT" into the same folder as the "ttextract.exe" program on your PC.
- Run "ttextract.exe" on your PC.
- Place the two resulting files ("ttdldi.dat" and "ttpatch.dat") into the "YSMenu" folder on your microSD card.
- (a) If you want "YSMenu" to be your default menu, rename the fake-killer-disabled "TTMENU.DAT" to "TTMenu.nds" and place it onto the root (top level) of your microSD card.
- Then place a copy of "YSMenu.nds" onto the root of your microSD card.
- Then make a copy of "YSMenu.nds" & rename that to "TTMENU.DAT" & place it also on the root of your microSD card.
- (b) If you want "TTMenu" to be the default menu, place a copy of the fake-killer-disabled TTMENU.DAT onto the root (top level) of your microSD card.
- Then place a copy of "YSMenu.nds" onto the root of your microSD card.
- Then make a copy of "TTMENU.DAT" & rename it to "TTMenu.nds" on the root of your card.
- (a) If you want "YSMenu" to be your default menu, rename the fake-killer-disabled "TTMENU.DAT" to "TTMenu.nds" and place it onto the root (top level) of your microSD card.
You should now have "TTMenu.nds", "YSMenu.nds", and "TTMENU.DAT" (a copy of "TTMENU.DAT" or "YSMenu.nds" depending on your choice) on the root of your microSD card.
- Edit "YSMenu.ini". Place a semi-colon in front of the line that says "LITERALS=LITERALS_JPN" & Remove the semi-colon from the line that says "LITERALS=LITERALS_ENG".
- Save your changes to "YSMenu.ini" and place it into the "YSMenu" folder on your microSD card.
- Make a new folder named "Games" and put a few .nds files in it.
- Use the "safely remove hardware" utility before removing your microSD card from your PC
- Place the DSTT into the NDS, place the microSD card into the DSTT, and turn on the NDS.
That should be it.
- If you are using TTMenu as your default, simply run "YSMenu.nds" to get to YSMenu. Otherwise, it should launch directly into YSMenu and you can run "TTMenu.nds" to get back to TTMenu.
When you're done, you should have the following files and folders on your microSD card:
  YSMenu.nds (YSMenu)
  TTMenu.nds (fake-killer-disabled version of TTMenu)
  TTMENU.DAT (a copy of whichever of the above two you want as your default menu)
  YSMENU (YSMenu firmware folder)
     |_ YSMenu.ini (YSMenu init file)
     |_ ttdldi.dat (extracted from the fake-killer-disabled loader using ttextract.exe)
     |_ ttpatch.dat (extracted from the fake-killer-disabled loader using ttextract.exe)
     |_ YSMenu1.bmp (optional skin: See later)
     |_ YSMenu2.bmp (optional skin:See later)
  TTMENU (official firmware folder)
     |_ all the files from the official TTMENU folder are here
  Games (games folder)
     |_ your .nds files go here
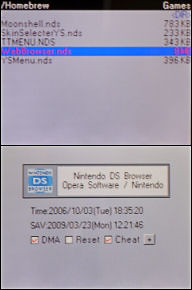
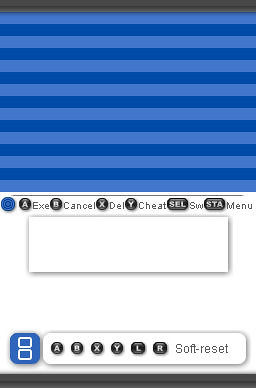
How do you use it ?
- Use 'D-pad' to move (Up/Down - Move by 1 file, Left/Right - Move a Page at a time)
- Highlight a file and press [A] to Launch
- If file is NDS: Press [Y] to select cheat codes
- If file is GBA: Press [Y] to just load GBA to PSRAM in slot 2 (What is PSRAM? - See This)
- If file is SAV: Press [A] to create a backup ('BAK')
- If file is BAK: Press [A] to restore & overwrite existing SAV
- Press [B] to Exit or go back
- Highlight any file and press [X] to Delete
- Press [Start] to be able to select either 'Passme' function / 'Boot to GBA' or return to normal 'DS Menu' (the one that contains Pictochat & Settings)
- Press [Select] to change file listing to show: Only 'nds' / Only 'Sav'/ All files (even hidden)
- Tap the top left of the touch screen to alter screen brightness
- Tap on 'Yasu Software - YS menu' will reveal the Version you have (In black ink, so you may not be able to read it if you have a dark background)
Customising ?
Unfortunately YSMenu does not allow much in the way of customising Skins/Themes like a R4 or Acekard.
although it does allow you to have a different background showing on both screens.
To do this all that's needed is 2 pictures of size 256 x 192 labelled 'YSMenu1.bmp' (for the top screen) and 'YSMenu2.bmp' (for the bottom screen). These need to be placed in the 'YSMenu' folder on your MicroSD card
You can also alter the colours of the text used for Directory Path/File names etc by editing the 'YSMenu.ini' file also found in the YSMenu folder The section required is
[FILELIST]
; COLOR = BIT15 | BGR(5bit x3)
COLOR_PATH=0xFFFF (Ink colour of the Directory Path shown @ top of top screen)
COLOR_FILE=0xFFFF (Ink colour of Filename (nds/txt/gba etc) on top screen)
COLOR_FOLDER=0x80FF (Ink colour of Folders on top screen)
COLOR_SELECT=0xFC00 (Background colour of Filename when highlighted)
COLOR_SELTEXT=0x801F (Ink colour of filename when highlighted)
-
[FILEINFO]
COLOR_TEXT=0x80F0 (Ink colour of Text shown in bottom screen)
DRAW_FRAME=true (Set to 'false' with NOT display a background box on bottom screen behind Game title text)
To determine the Hex code for the colour you would like to use,pop along to http://www.conradshome.com/html2bgr15/
There is also a homebrew software called 'SkinselecterYS' Here that can be used to swap the background Pictures/Colour scheme of multiple Skins installed on the DSTT.
Unfortunately the readme file is in Japanese but you can see how to use it in This Thread
'YSMenu.ini' Options
- [YSMENU]
- You can change the language by place a ';' in front of any of the 'LITERALS=' to disable it & remove the ';' to enable it (As mentioned before in 'Setting up')
- Further down the file you will find sections labelled [LITERALS_???] (where ??? is a language e.g JAP).
- By altering the text to the right of the '=' You can get YSMenu to display whatever you like (e.g. if you change 'LOADING=Please Wait...' then YSMenu will show 'Please Wait...' instead of 'Loading...')
- In theory you could create additional languages by copying/Pasting an existing [LITERALS_???] section (Changing the section header to something else like '[LITERALS_GER]' for German) & changing the text in the section, then by adding a LITERALS=LITERALS_GER under [YSMENU]
- SORT_BY_TIME=
- Changing this to 'True' will cause the files to be shown depending upon the time they were last used instead of the normal 'alphabetically sorted'.
- In other words the games you play more often will appear near the top, while the lesser played ones are at the bottom. (this is determined by the game SAV time stamp)
- VERSION=
- Whatever is put here will replace the 'Yasu Software - YS menu' text @ the bottom of the touch screen.
- When touched - the version text will still be shown in Black ink though
- NO_DEL=
- Changing this to 'true' will prevent you from using the [X] button to delete files.
- Handy if you want to prevent any little ones from deleting your current SAV by mistake
- DEFAULT_DMA= / DEFAULT_RESET=
- Change from 'false' to 'true' (or 'true' to 'false') will cause all programs to have the appropriate option box ticked/unticked by default
- EXT_APP1_FILE= / EXT_APP1_NAME=
- This will cause an extra button to appear when you press [Start] for the 'Passme' / 'Boot GBA' option screen
- Clicking on the extra button will start the program mentioned in 'EXT_APP1_FILE'
- You can in fact have more than just the one extra button - Just by adding 'EXT_APP2_FILE=' and 'EXT_APP2_NAME=' (up to 'EXT_APP9_FILE'/'EXT_APP9_NAME')
- [FILETYPE]
- Adding a file format will allow that particular file to show up in YSMenu file browser (e.g. TXT/BMP/MP3 etc).
- Note that I haven't figured out how to launch an appropiate program for any additional formats or even if it's possible
- Some files have already been set up for GBA/NES/NeoGeo/Sega Master System and WonderSwan [?!?] emulation
- - these require additional programs installed into the YSMenu folder, along with a Slot 2 Flash card like the EZ3-in-1, to work
Downloads
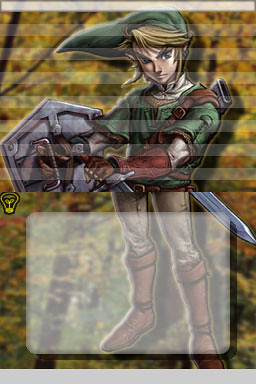
| Skins | ||
|---|---|---|
| YSDSTT: Download, Picture | GBATemp: Download, Picture | Zelda: Download, Picture |
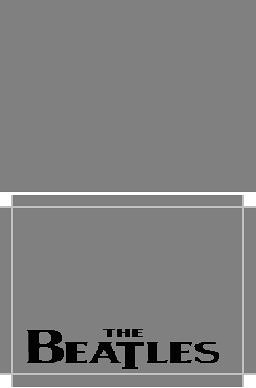
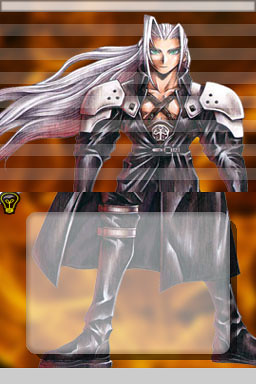
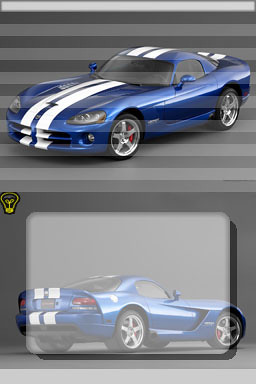
| NDS menu: Download, Picture | Beatles: Download,Picture | Sephiroth: Download, Picture |
| NintendoVN: Download, Picture | Dodge Viper: Download, Picture | Rockstar: Download, Picture |
| Others | ||
| Fake-killer-disabled TTMENU.DAT: Download | YSMenu Automated Installer: Download | SkinselecterYS (Homebrew): Download |
| Panasonic MicroSD formatter: Download | ||
Credits
Most of this is already in the forums somewhere done by other people, So Many Thanks to the following :-
- KermitFrog - For Putting it all together & adding the 'YSMenu.ini' info
- Bri - For 'Where to get it'/Installation
- Ozzymud - For creating the 15Bit color converter webpage
- Logue - For Creating the 'Automated YSMenu Installer'
- Bidoofguy - For figuring out how to use 'SkinSelecterYS'
- Apocalypticvisionary / Swip / 8BitWalugi - For other small little titbits of info on YSmenu Usage